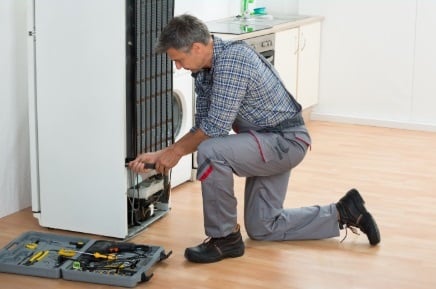
How to Replace a Dryer Belt
If a dryer belt in your Whirlpool dryer should be replaced, you do not have to opt for professional repair service right away, because it is a quite simple work that you can do yourself. We will provide you with clear and detailed instructions on how to do this for saving your time and money.
The Tools You Will Need
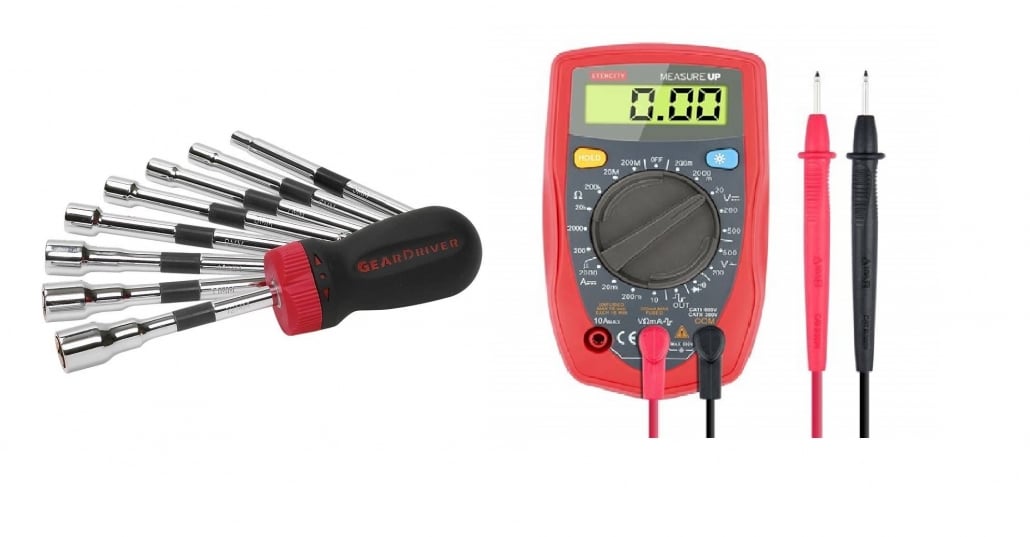
Before you start the replacement process, make sure that you have all the needed tools and parts, including the following:
- screwdriver;
- 5/16″ nut driver;
- putty knife;
- slotted screwdriver;
- vacuum;
- container for screws.
Also, you should prepare a new dryer belt. The entire process will take you less than 90 minutes.
Step by Step Process
Below, you will find detailed instructions on how you can replace your Whirlpool dryer’s belt yourself.
Step 1: Unplug the appliance
Unplug the dryer and make sure that it is fully disconnected from power. Before you start working, it is recommended to wear protective gloves.
Step 2: Remove the lint screen
Take the lint screen out of the housing by grabbing it with your fingers and pulling it up. Once the part is removed, set it aside.
Step 3: Take out housing screws of the lint screen
This is how you will get access to two screws that attach the lint screen housing to the top panel. You need to take them out, and for this purpose, you should use your Philips screwdriver. Once the screws are removed, place them into your container for screws.
Step 4: Raise the cabinet top
Insert your putty knife in the opening under the lid near the right edge of the front of the dryer and pull it up to open. Repeat the same procedure with the left edge of the dryer.
Now, you can lift the top of your appliance and place it carefully against the wall behind the appliance.
Step 5: Disconnect the door switch wire harness
Use a slotted screwdriver for releasing the locking tab on the wire harness plug in order to disconnect the door switch.
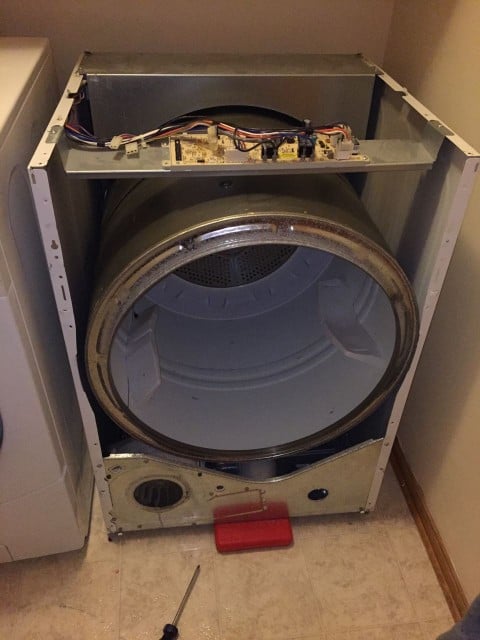
Step 6: Remove the front panel
You will need to use a nut driver for removing the front panel mounting screws from the inside of the cabinet. You will have two of them in each upper corner of the appliance. Place them in the container for screws to make sure that they will not be lost.
Push the front panel forward slightly, lift, and unhook it from two bottom hangers. Pull the front panel off the appliance and set it aside.
Step 7: Remove the drive belt
Remove the old belt by grabbing it with your fingers and pulling it off gently. If it does not come out easily, release it. The belt is looped under the idler pulley and attached to the motor, so you will need to unhook the belt from around the motor.
Please note that dryers can get quite dirty over time, and since you have accessed the inside of the appliance, you can use this situation to clean everything well. All you have to do for this purpose is to pull out the drum, then use your vacuum to clean it, and place it back.
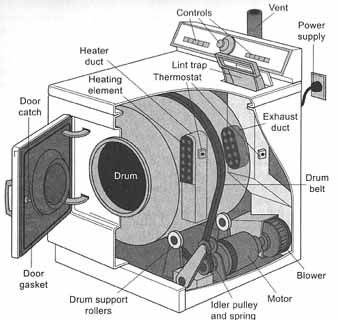
Step 8. Install the new drive belt
Position a new dryer belt around the dryer drum.
Run the belt underneath the dryer and through the pulley. Now you will need to thread the belt through the idle pulley (it comes with a moving wheel). Push the idle pulley to the right and lift the dryer belt over the motor pulley.
If the drum of your appliance sags down, you may need to ask somebody to help you with that. Also, you can simply remove the drum to attach the dryer belt to the pulley motor and then install it back and run the belt around the drum. Make sure that the idler pulley applies tension to the belt.
It is also important to make sure that the rear felt located on the back of the drum is not folded under. You can pop it out by rolling the drum with your hands and using a screwdriver.
Step 9: Reinstall the front panel
Place the front panel back on the hangers located at the bottom of the cabinet.
Now you will need to reinstall the screws. Line up the screw holes and install the screws on the top of the front panel to secure them to a dryer’s cabinet.
Step 10: Reconnect the door switch wire harness.
Insert the wire harness back into the plug of the door switch.
Step. 11: Reassemble the dryer
Now you can close the top panel by lowering it until it reaches the cabinet and snapping it in the place.
Reinstall the screws into the holes in the lint screen housing.
Reinstall the lint screen.
Step 12: Restore the power to the dryer
Now you can plug the dryer in.
That is all, and now you can start using your appliance.