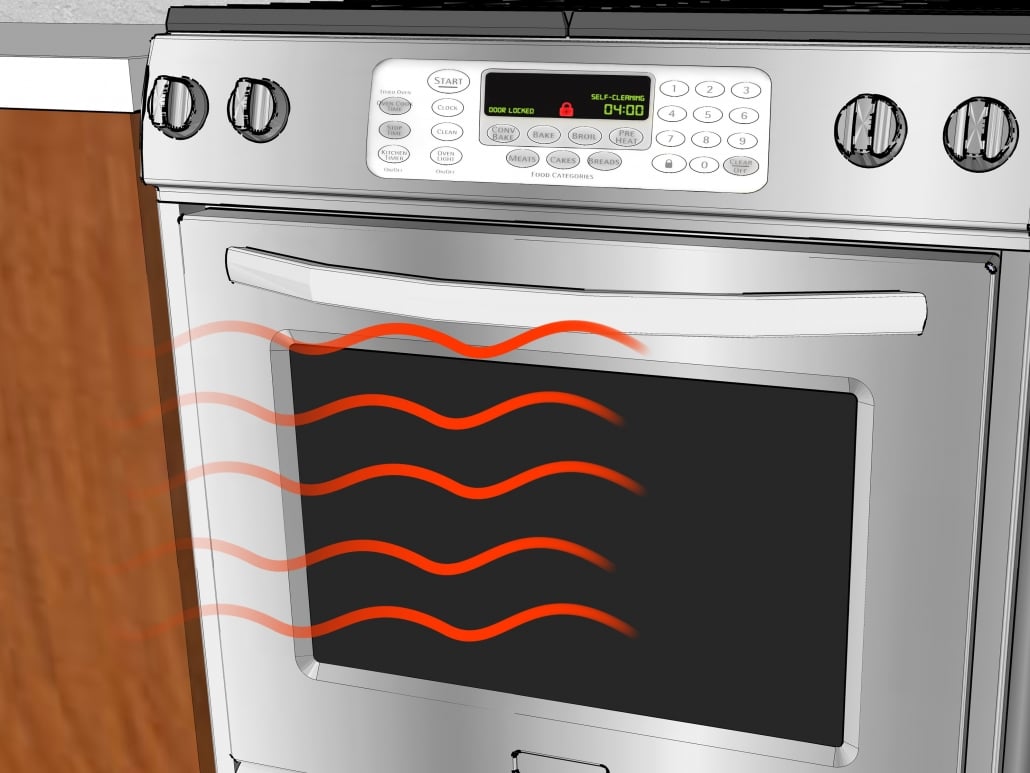
Our and the Industry News

Self-Cleaning Oven

Self-Cleaning Oven Actionable Guide

Self-cleaning ovens are very convenient to use but they require special knowledge of how to maintain them properly. Since there are various models of those appliances you can choose from, there are also certain differences in how they should be used. Therefore, going through recommendations applied to your self-cleaning oven is important.

Below, you will find some helpful info on those appliances and their use.

How Does a Self-Cleaning Oven Work?

Self-cleaning ovens are the same traditional ovens but with a special feature that allows cleaning grease and grime without you being involved in the cleaning process. All you have to do is to press the right button and collect some mess after a self-cleaning cycle.
Most of such appliances use extremely high heat reaching up to 1000°F to burn off all the dirt and debris remaining in your oven after cooking. Everything left inside of the oven will turn into ash found on the bottom of the appliance after a self-cleaning cycle.
To perform the self-cleaning function, such appliances come with additional elements and parts, including the following:

  • A timer. It shows for how long the self-cleaning function has been operating;
  • An additional thermostatic element to control the extremely high temperatures;
  • A secure oven door latch. It is dangerous to open the oven’s door during the self-cleaning procedure, and the door locking system will not allow you to do that.

As a result, you will get a perfectly clean oven without using any special cleaners.

How to Use a Self-Cleaning Oven

Before you start using your self-cleaning oven, go through the manufacturer’s recommendations. There may be significant differences between models produced by different companies.
Usually, you can use such ovens in a traditional way for cooking, baking and so on, but dedicating some time to learn how to use its self-cleaning function is important. Basically, you will just need to know what should be done to ensure the safe and effective use of such an appliance.

Types of Self-Cleaning Oven

There are three main types of self-cleaning ovens:

  • Pyrolytic. The heat inside of such ovens can be over 900°F to burn off any dirt and debris;
  • Catalytic. They rely on enzyme-based liners for an effective food breakdown;
  • Steam. Such appliances use high pressured steam to evaporate residues.


self-cleaning oven

How to Clean a Self-Cleaning Oven

There are just a few steps that you will need to take for cleaning your oven, including the following:

Step 1. Empty the oven

Everything stored in the oven should be removed, including racks, pans, pots, aluminum foil, cookie sheets, etc. Since high heat will be applied to everything in the oven, such items may be damaged. There is no need to use any chemical cleaners.

Step 2. Close the oven’s door

After making sure that the stove is empty, you should close the oven’s door so that the locking door system could be activated.

Step 3. Press the button

Before you press the button to start the cleaning process, you should make sure that someone will be at home while the cycle is on. You should not leave the working oven unsupervised. The thing is that when the dirt is burnt off, smoke can be produced, which may reach your smoke detector.
Moreover, due to the excess heat, you will likely want to open a window and cool the room. You can also use an exhaust fan to get rid of smoke and unpleasant odors.

Step 4. Wait until the cleaning cycle is over

You will not be able to open the door until both clean and cool-down phases are completed, which is important for safety purposes. Once the appliance is cool enough, the door will unlock automatically.

Step 5.Wipe everything down

You can use a damp cloth or sponge to remove the ash. The door edge and seals require using hydrogen peroxide to clean them manually.
There are different instructions on how often the self-cleaning function should be used. This really depends on the model, so for more information, you should read the manufacturer’s recommendations. Usually, such an operation is conducted from 6 to 12 times per year.

How Long Does a Self-Cleaning Oven Cycle Take?

Since there are different types of self-cleaning ovens and various models from numerous manufacturers, there is no particular amount of time required for cleaning all of them. Moreover, the duration of the cleaning process also depends on how much dirt is there inside of your oven — the dirtier it is, the longer the cleaning cycle will last.
Usually, the process will take from one to five hours. It is great that your oven will do everything itself, but you should not leave the house. Therefore, you should plan the cleaning cycle to stay at home and make sure that everything is fine. Since lots of heat is generated, many people prefer to run the cycle in the evening time, especially those living in a hot climate.

Do’s and Don’ts

Below, you will find a list of do’s and don’ts that will help you ensure the safe and effective use of your oven.
Do’s:

  • Read your manufacturer’s instructions before running a cleaning cycle. If you cannot find your manual, search for instructions on the Internet;
  • Clean only the parts of the appliance listed in your manual;
  • Remove all the racks, pans, pots, and other items from your oven before cleaning.

Don’ts

  • Don’t touch the appliance or let your children be near it during the cleaning cycle, because it is too hot;
  • Don’t use oven cleaners or coaters;
  • Don’t clean the door gasket to avoid damaging the seal.

Repair a Self-Cleaning Oven

There are a few common issues typical for those ovens due to the self-cleaning function. These may result from both extreme heat and regular wear off.

The oven does not turn on after self-cleaning

Due to the excess heat, some parts may be damaged. You should check them, particularly, the thermal fuse and the wires.

The oven’s door does not open

You should wait for some time as the door is locked not to allow you to open it until the oven is cool enough. If nothing happens after waiting for a few hours, turn off the power using the circuit breaker and turn it on again in a minute. If nothing works, the door locking mechanism might require replacement.

Your meals are uncooked or overcooked

Thermostat/thermal fuses control the temperature settings. They are located on top of the appliance or on its walls and can get damaged due to the high heat, which may result in inaccurate temperature readings. This part should be examined carefully and likely replaced.

There are error codes on the main electronic board

Electronic boards are located on the top of the ovens and can also be affected by the heat. Only replacing those parts will help you manage the situation.

Dishwasher Error Codes by Brands

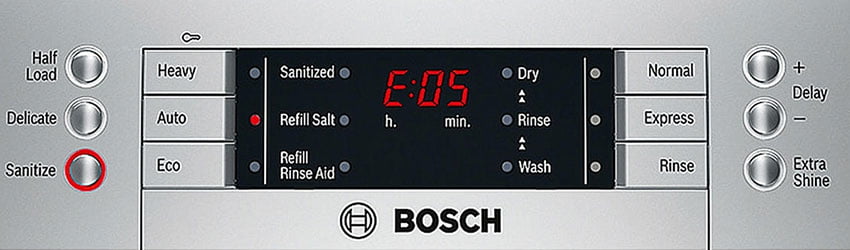
Dishwasher Error Codes by Brands

The majority of modern dishwashers will show you a certain error code when a malfunction occurs. Understanding the meaning of the code will help you spot the exact problem with the appliance and even solve it by yourself. Here are some of the commonly used codes for the most well-known brands.

Bosch Dishwasher Error Codes

These error codes will help you to troubleshoot a Bosch dishwasher. Search the necessary code in the table to identify the problem.

CodeErrorAdvised solution
E1Problems with heatingUsually this means that the heating element is malfunctioning. Replace the heating element if necessary.
E3Problems with fillingVerify that the tap is fully open. If the machine still does not fill, examine the inlet valve. Ensure that it is not obstructed.
E5Problems with overflowingCut the power to the dishwasher to stop filling. If the water continues to flow, examine the inlet valve and replace it if needed.
E24Problems with drainingExamine the filters and clean them from accumulated debris. Replace the part if needed.

Samsung Dishwasher Error Codes

Consult with the table to find out about your specific problem. If you are unable to find your code here, please refer to a handbook for Samsung dishwashers.

CodeErrorAdvised solution
4EProblems with fillingVerify that the tap is fully open. If the machine still does not fill, examine the inlet valve. Ensure that it is not obstructed.
5EProblems with drainingExamine the filters and clean them from accumulated debris. Replace the part if needed.
LEProblems with leakingInspect the bottom of the appliance and the pipes to establish whether there is a leakage. Replace the damaged parts.
HEProblems with heatingUsually this means that the heating element is malfunctioning. Replace it if necessary.

Frigidaire Dishwasher Error Codes

This is a helpful list of possible fault codes, which can appear on Frigidaire dishwashers. Look for your specific code to find a solution.

CodeErrorAdvised solution
i10Problems with fillingVerify that the tap is fully open. If the machine still does not fill, examine the inlet valve. Ensure that it is not obstructed.
i20Problems with drainingExamine the filters and clean them from accumulated debris. Replace the part if needed.
UFProblems with the fanCheck the wiring connecting the fan assembly and the control board. Make sure everything is wired correctly. Replace the assembly if needed.
CLProblems with the doorSee whether the door is shut tightly and the dishes do not obstruct it from closing.

LG Dishwasher Error Codes

This table includes some of the frequently appearing fault codes for LG dishwashers. You can check this list to find a code you require.

CodeErrorAdvised solution
OEProblems with drainingExamine the filters and clean them from accumulated debris. Replace the part if needed.
nEProblems with the motorSee whether the wires connected to the motor are undamaged. If the wiring is in good condition, you should examine the motor itself. Replace this part if necessary.
FEProblems with overflowingCut the power to the dishwasher to stop filling. If the water continues to flow, examine the inlet valve and replace it if needed.
AEProblems with leakingInspect the bottom of the appliance and the pipes find out whether there is a leakage. Replace the damaged parts.

Electrolux Dishwasher Error Codes

The owners of Electrolux dishwashers might find the table below very handy. It contains some of the most widespread fault codes.

CodeErrorAdvised solution
Er-01Problems with leakingInspect the bottom of the appliance and the pipes in to discover whether there is a leakage. Replace the damaged parts.
Er-03Problems with the motorSee whether the wires connected to the motor are undamaged. If the wiring is in good condition, you should examine the motor itself. Replace this part if necessary.
Er-04Problems with the fanCheck the wiring connecting the fan assembly and the control board. Make sure everything is wired correctly. Replace the assembly if needed.
Er-13Problems with the control boardSuch a part is hard to fix, and it should be replaced with a new one.

Whirlpool Dishwasher Error Codes

To troubleshoot your Whirlpool dishwasher, you should check with the list of codes below and find the one displayed on your appliance.

CodeErrorAdvised solution
F2Problems with leakingInspect the bottom of the appliance and the pipes to see whether there is a leakage. Replace the damaged parts.
F8Problems with overflowingCut the power from the dishwasher to stop filling. If the water continues to flow, examine the inlet valve and replace it if needed.
FCProblems with hard waterThis issue can be easily fixed by adding special salt to soften hard water.
F9Problems with constant water flowVerify that the inlet valve is fully closed when the machine is not working. Replace the valve in case of malfunction.

Kenmore Dishwasher Error Codes

Examine this list of codes to find a solution to your specific problems. The list is not full, so consult with your Kenmore dishwasher manual if needed.

CodeErrorAdvised solution
1-1Problems with the control boardThis part is hard to fix, and it should be replaced with the new one.
5-1Problems with the doorSee whether the door is shut tightly and the dishes do not obstruct it from closing.
6-1Problems with fillingVerify that the tap is fully open. If the machine still does not fill, examine the inlet valve. Ensure that it is not obstructed.
8-1Problems with drainingExamine the filters and clean them from accumulated debris. Replace the part if needed.

Maytag Dishwasher Error Codes

Look through the listed codes to find the one displayed on your Maytag dishwasher. Check the advised solution to solve the problem.

CodeErrorAdvised solution
F2Problems with heatingUsually this means that the heating element is malfunctioning. Replace it if necessary.
F4Problems with a cleaning agentVerify that the detergent is loaded and the dispenser is not obstructed.
F0Problems with the control boardThis part is hard to repair, and it should be replaced with a new one.
1F4Problems with the water temperatureThe dishwasher will not work if the water is too cold. Check your handbook to find out the suitable temperature.

Viking Dishwasher Error Codes

The provided fault codes are the most widespread among Viking dishwashers. These can help you in identifying the issue and fixing it.

CodeErrorAdvised solution
Flash 5Problems with drainingExamine the filters and clean them from accumulated debris. Replace the part if needed.
Flash 2Problems with fillingVerify that the tap is fully open. If the machine still does not fill, examine the inlet valve. Ensure that it is not obstructed.
Flash 4Internal issueTry turning the dishwasher off and cutting the power. Switch it back on afterward.
Flash 3Problems with drainingExamine the filters and clean them from accumulated debris. Replace the part if needed.

Kitchenaid Dishwasher Error Codes

Sometimes Kitchenaid dishwasher owners can receive an error code. Search for your code in the table below and find out the solution.

CodeErrorAdvised solution
2-1write valueTry pressing all the buttons in case one of them becomes jammed. If this does not help pop it out you should replace the panel.
5-1Problems with the doorSee whether the door is shut tightly and the dishes do not obstruct it from closing.
6-1Problems with fillingVerify that the tap is fully open. If the machine still does not fill, examine the inlet valve. Ensure that it is not obstructed.
7-1Problems with heatingUsually this means that the heating element is malfunctioning. Replace it if necessary.