[av_one_full first min_height=” vertical_alignment=” space=” custom_margin=” margin=’0px’ row_boxshadow=” row_boxshadow_color=” row_boxshadow_width=’10’ link=” linktarget=” link_hover=” padding=’0px’ highlight=” highlight_size=” border=” border_color=” radius=’0px’ column_boxshadow=” column_boxshadow_color=” column_boxshadow_width=’10’ background=’bg_color’ background_color=” background_gradient_color1=” background_gradient_color2=” background_gradient_direction=’vertical’ src=” background_position=’top left’ background_repeat=’no-repeat’ animation=” mobile_breaking=” mobile_display=” av_uid=’av-29t8oo’]
[av_heading heading=’Fixing Washing Machine That Fills Slowly’ tag=’h1′ link_apply=” link=’manually,http://’ link_target=” style=” size=” subheading_active=” subheading_size=’15’ margin=” padding=’10’ color=” custom_font=” custom_class=” admin_preview_bg=” av-desktop-hide=” av-medium-hide=” av-small-hide=” av-mini-hide=” av-medium-font-size-title=” av-small-font-size-title=” av-mini-font-size-title=” av-medium-font-size=” av-small-font-size=” av-mini-font-size=” av_uid=’av-8jnwi’][/av_heading]
[av_textblock size=” font_color=” color=” av-medium-font-size=” av-small-font-size=” av-mini-font-size=” av_uid=’av-jxqkjzmd’ admin_preview_bg=”]
Clean clothes are what most people take for granted; however, when the washing machine breaks, the difficulties arise. There are many reasons why a certain machine does not work. While some of them require professional attention, others can be easily fixed yourself.
Required Tools
Usually, you do not need a full set of plumbing tools to fix the slow washing machine problem. In many cases, all that is required is:
- a nut driver
- a pocket knife
- and pliers.
[/av_textblock]
[av_hr class=’default’ height=’50’ shadow=’no-shadow’ position=’center’ custom_border=’av-border-thin’ custom_width=’50px’ custom_border_color=” custom_margin_top=’30px’ custom_margin_bottom=’30px’ icon_select=’yes’ custom_icon_color=” icon=’ue808′ av-desktop-hide=” av-medium-hide=” av-small-hide=” av-mini-hide=” av_uid=’av-3wokzc’]
[av_image src=’https://careandrepairs.cawp-content/uploads/2019/08/plier_screwdriver-1500×430.jpg’ attachment=’4378′ attachment_size=’featured’ align=’center’ styling=” hover=” link=” target=” caption=” font_size=” appearance=” overlay_opacity=’0.4′ overlay_color=’#000000′ overlay_text_color=’#ffffff’ copyright=” animation=’no-animation’ av_uid=’av-jzn95lnk’ admin_preview_bg=”][/av_image]
[av_hr class=’default’ height=’50’ shadow=’no-shadow’ position=’center’ custom_border=’av-border-thin’ custom_width=’50px’ custom_border_color=” custom_margin_top=’30px’ custom_margin_bottom=’30px’ icon_select=’yes’ custom_icon_color=” icon=’ue808′ av-desktop-hide=” av-medium-hide=” av-small-hide=” av-mini-hide=” av_uid=’av-39s1c8′]
[av_textblock size=” font_color=” color=” av-medium-font-size=” av-small-font-size=” av-mini-font-size=” av_uid=’av-jxqkjzmd’ admin_preview_bg=”]
Water Valves
One of the most common reasons why your machine is not filling with water or filling slowly is that the water valves are clogged or the valve itself is faulty.
[/av_textblock]
[av_hr class=’default’ height=’50’ shadow=’no-shadow’ position=’center’ custom_border=’av-border-thin’ custom_width=’50px’ custom_border_color=” custom_margin_top=’30px’ custom_margin_bottom=’30px’ icon_select=’yes’ custom_icon_color=” icon=’ue808′ av-desktop-hide=” av-medium-hide=” av-small-hide=” av-mini-hide=” av_uid=’av-39s1c8′]
[av_image src=’https://careandrepairs.cawp-content/uploads/2019/08/Water-Inlet-Valve-1.jpg’ attachment=’4361′ attachment_size=’full’ align=’center’ styling=” hover=” link=” target=” caption=” font_size=” appearance=” overlay_opacity=’0.4′ overlay_color=’#000000′ overlay_text_color=’#ffffff’ copyright=” animation=’no-animation’ av_uid=’av-jzn95lnk’ admin_preview_bg=”][/av_image]
[av_hr class=’default’ height=’50’ shadow=’no-shadow’ position=’center’ custom_border=’av-border-thin’ custom_width=’50px’ custom_border_color=” custom_margin_top=’30px’ custom_margin_bottom=’30px’ icon_select=’yes’ custom_icon_color=” icon=’ue808′ av-desktop-hide=” av-medium-hide=” av-small-hide=” av-mini-hide=” av_uid=’av-39s1c8′]
[/av_one_full]
[av_one_full first min_height=” vertical_alignment=” space=” custom_margin=” margin=’0px’ row_boxshadow=” row_boxshadow_color=” row_boxshadow_width=’10’ link=” linktarget=” link_hover=” padding=’0px’ highlight=” highlight_size=” border=” border_color=” radius=’0px’ column_boxshadow=” column_boxshadow_color=” column_boxshadow_width=’10’ background=’bg_color’ background_color=” background_gradient_color1=” background_gradient_color2=” background_gradient_direction=’vertical’ src=” background_position=’top left’ background_repeat=’no-repeat’ animation=” mobile_breaking=” mobile_display=” av_uid=’av-6x66u0′]
[av_textblock size=” font_color=” color=” av-medium-font-size=” av-small-font-size=” av-mini-font-size=” av_uid=’av-jxwe1ipn’ admin_preview_bg=”]
Check the Fill Valve Screen
The first thing to do if you think that the valve screen is clogged is to clean it. To do that, you need to unplug your machine, turn it around, and disconnect the hoses. Once you have done this, you should check the screens of the hoses. If you see that there is some debris on the screens, you should remove it with a pocket knife and clean water.
When you have completed this stage, attach the hoses back. After plugging the machine in, start any cycle to see whether the machine is filling with water properly. If this does not help, the chances are that the valve should be replaced.
[/av_textblock]
[av_hr class=’default’ height=’50’ shadow=’no-shadow’ position=’center’ custom_border=’av-border-thin’ custom_width=’50px’ custom_border_color=” custom_margin_top=’30px’ custom_margin_bottom=’30px’ icon_select=’yes’ custom_icon_color=” icon=’ue808′ av-desktop-hide=” av-medium-hide=” av-small-hide=” av-mini-hide=” av_uid=’av-39s1c8′]
[av_image src=’https://careandrepairs.cawp-content/uploads/2019/08/inlet-screen.jpg’ attachment=’4246′ attachment_size=’full’ align=’center’ styling=” hover=” link=” target=” caption=” font_size=” appearance=” overlay_opacity=’0.4′ overlay_color=’#000000′ overlay_text_color=’#ffffff’ copyright=” animation=’no-animation’ av_uid=’av-jxwe24nx’ admin_preview_bg=”][/av_image]
[av_hr class=’default’ height=’50’ shadow=’no-shadow’ position=’center’ custom_border=’av-border-thin’ custom_width=’50px’ custom_border_color=” custom_margin_top=’30px’ custom_margin_bottom=’30px’ icon_select=’yes’ custom_icon_color=” icon=’ue808′ av-desktop-hide=” av-medium-hide=” av-small-hide=” av-mini-hide=” av_uid=’av-39s1c8′]
[/av_one_full]
[av_one_full first min_height=” vertical_alignment=” space=” custom_margin=” margin=’0px’ row_boxshadow=” row_boxshadow_color=” row_boxshadow_width=’10’ link=” linktarget=” link_hover=” padding=’0px’ highlight=” highlight_size=” border=” border_color=” radius=’0px’ column_boxshadow=” column_boxshadow_color=” column_boxshadow_width=’10’ background=’bg_color’ background_color=” background_gradient_color1=” background_gradient_color2=” background_gradient_direction=’vertical’ src=” background_position=’top left’ background_repeat=’no-repeat’ animation=” mobile_breaking=” mobile_display=” av_uid=’av-5aw2fc’]
[av_textblock size=” font_color=” color=” av-medium-font-size=” av-small-font-size=” av-mini-font-size=” av_uid=’av-jxwdylhd’ admin_preview_bg=”]
Release the Fill Valve
If you decide to change the valve yourself, you need to detach it first. Using a screwdriver, you can remove the screws that keep the valve on the side of your washer.
Do not start the process of removal until your machine is plugged off!
Open the Top
After you have unscrewed the metal screws that hold the valve, you need to open the top of your machine.
[/av_textblock]
[av_hr class=’default’ height=’50’ shadow=’no-shadow’ position=’center’ custom_border=’av-border-thin’ custom_width=’50px’ custom_border_color=” custom_margin_top=’30px’ custom_margin_bottom=’30px’ icon_select=’yes’ custom_icon_color=” icon=’ue808′ av-desktop-hide=” av-medium-hide=” av-small-hide=” av-mini-hide=” av_uid=’av-39s1c8′]
[av_image src=’https://careandrepairs.cawp-content/uploads/2019/08/fill-valve-1500×430.jpg’ attachment=’4379′ attachment_size=’featured’ align=’center’ styling=” hover=” link=” target=” caption=” font_size=” appearance=” overlay_opacity=’0.4′ overlay_color=’#000000′ overlay_text_color=’#ffffff’ copyright=” animation=’no-animation’ av_uid=’av-jxwdz57i’ admin_preview_bg=”][/av_image]
[av_hr class=’default’ height=’50’ shadow=’no-shadow’ position=’center’ custom_border=’av-border-thin’ custom_width=’50px’ custom_border_color=” custom_margin_top=’30px’ custom_margin_bottom=’30px’ icon_select=’yes’ custom_icon_color=” icon=’ue808′ av-desktop-hide=” av-medium-hide=” av-small-hide=” av-mini-hide=” av_uid=’av-39s1c8′]
[/av_one_full]
[av_one_full first min_height=” vertical_alignment=” space=” custom_margin=” margin=’0px’ row_boxshadow=” row_boxshadow_color=” row_boxshadow_width=’10’ link=” linktarget=” link_hover=” padding=’0px’ highlight=” highlight_size=” border=” border_color=” radius=’0px’ column_boxshadow=” column_boxshadow_color=” column_boxshadow_width=’10’ background=’bg_color’ background_color=” background_gradient_color1=” background_gradient_color2=” background_gradient_direction=’vertical’ src=” background_position=’top left’ background_repeat=’no-repeat’ animation=” mobile_breaking=” mobile_display=” av_uid=’av-3is408′]
[av_textblock size=” font_color=” color=” av-medium-font-size=” av-small-font-size=” av-mini-font-size=” av_uid=’av-jxwdvsxq’ admin_preview_bg=”]
Replace the Valve
After opening the lid of your machine, you need to take the broken valve out. It is essential that while you are changing the wires to make sure that the new wires fit well.
You should loosen the hose clamp so that you can twist it out of the broken valve to install a new one. After that, you should clamp the hose to the new valve. It is recommended to use pliers for this purpose to ensure that the hose is properly attached to the valve.
The process is fairly simple as long as you follow all the steps one by one. After installing the new valves, you can attach the hoses and check how the machine works.
[/av_textblock]
[av_hr class=’default’ height=’50’ shadow=’no-shadow’ position=’center’ custom_border=’av-border-thin’ custom_width=’50px’ custom_border_color=” custom_margin_top=’30px’ custom_margin_bottom=’30px’ icon_select=’yes’ custom_icon_color=” icon=’ue808′ av-desktop-hide=” av-medium-hide=” av-small-hide=” av-mini-hide=” av_uid=’av-39s1c8′]
[/av_one_full]
[av_one_full first min_height=” vertical_alignment=” space=” custom_margin=” margin=’0px’ row_boxshadow=” row_boxshadow_color=” row_boxshadow_width=’10’ link=” linktarget=” link_hover=” padding=’0px’ highlight=” highlight_size=” border=” border_color=” radius=’0px’ column_boxshadow=” column_boxshadow_color=” column_boxshadow_width=’10’ background=’bg_color’ background_color=” background_gradient_color1=” background_gradient_color2=” background_gradient_direction=’vertical’ src=” background_position=’top left’ background_repeat=’no-repeat’ animation=” mobile_breaking=” mobile_display=” av_uid=’av-1ygi6g’]
[av_textblock size=” font_color=” color=” av-medium-font-size=” av-small-font-size=” av-mini-font-size=” av_uid=’av-jxwdsb2w’ admin_preview_bg=”]
Water Fill Hoses
Another issue that may prevent your machine from filling with water properly is the bent or clogged water fill hoses. If you turn your machine and make sure that the hoses are not bent or broken, you should check whether there is any build-up inside them. If the hoses are clogged, you need to change them to solve the issue.
[/av_textblock]
[av_hr class=’default’ height=’50’ shadow=’no-shadow’ position=’center’ custom_border=’av-border-thin’ custom_width=’50px’ custom_border_color=” custom_margin_top=’30px’ custom_margin_bottom=’30px’ icon_select=’yes’ custom_icon_color=” icon=’ue808′ av-desktop-hide=” av-medium-hide=” av-small-hide=” av-mini-hide=” av_uid=’av-39s1c8′]
[av_image src=’https://careandrepairs.cawp-content/uploads/2019/08/Water-Fill-Hoses-986×430.jpg’ attachment=’4381′ attachment_size=’featured’ align=’center’ styling=” hover=” link=” target=” caption=” font_size=” appearance=” overlay_opacity=’0.4′ overlay_color=’#000000′ overlay_text_color=’#ffffff’ copyright=” animation=’no-animation’ av_uid=’av-jxwds5tr’ admin_preview_bg=”][/av_image]
[av_hr class=’default’ height=’50’ shadow=’no-shadow’ position=’center’ custom_border=’av-border-thin’ custom_width=’50px’ custom_border_color=” custom_margin_top=’30px’ custom_margin_bottom=’30px’ icon_select=’yes’ custom_icon_color=” icon=’ue808′ av-desktop-hide=” av-medium-hide=” av-small-hide=” av-mini-hide=” av_uid=’av-39s1c8′]
[/av_one_full]
[av_one_full first min_height=” vertical_alignment=” space=” custom_margin=” margin=’0px’ row_boxshadow=” row_boxshadow_color=” row_boxshadow_width=’10’ link=” linktarget=” link_hover=” padding=’0px’ highlight=” highlight_size=” border=” border_color=” radius=’0px’ column_boxshadow=” column_boxshadow_color=” column_boxshadow_width=’10’ background=’bg_color’ background_color=” background_gradient_color1=” background_gradient_color2=” background_gradient_direction=’vertical’ src=” background_position=’top left’ background_repeat=’no-repeat’ animation=” mobile_breaking=” mobile_display=” av_uid=’av-1ygi6g’]
[av_textblock size=” font_color=” color=” av-medium-font-size=” av-small-font-size=” av-mini-font-size=” av_uid=’av-jxwdsb2w’ admin_preview_bg=”]
Clogged Filter Screens
There are also inlet or filter screens that filter the water that goes into the machine. If the filter screens are clogged, the chances are that the machine will be filling with water slowly.
To check whether this is the issue that you face, you need to detach the hoses from the valves. If you see any gunk stuck on the screens, you should clean it or change the screens.
[/av_textblock]
[av_hr class=’default’ height=’50’ shadow=’no-shadow’ position=’center’ custom_border=’av-border-thin’ custom_width=’50px’ custom_border_color=” custom_margin_top=’30px’ custom_margin_bottom=’30px’ icon_select=’yes’ custom_icon_color=” icon=’ue808′ av-desktop-hide=” av-medium-hide=” av-small-hide=” av-mini-hide=” av_uid=’av-39s1c8′]
[av_image src=’https://careandrepairs.cawp-content/uploads/2019/08/filter-inside-washer-523×430.jpg’ attachment=’4382′ attachment_size=’featured’ align=’center’ styling=” hover=” link=” target=” caption=” font_size=” appearance=” overlay_opacity=’0.4′ overlay_color=’#000000′ overlay_text_color=’#ffffff’ copyright=” animation=’no-animation’ av_uid=’av-jxwds5tr’ admin_preview_bg=”][/av_image]
[av_hr class=’default’ height=’50’ shadow=’no-shadow’ position=’center’ custom_border=’av-border-thin’ custom_width=’50px’ custom_border_color=” custom_margin_top=’30px’ custom_margin_bottom=’30px’ icon_select=’yes’ custom_icon_color=” icon=’ue808′ av-desktop-hide=” av-medium-hide=” av-small-hide=” av-mini-hide=” av_uid=’av-39s1c8′]
[/av_one_full]
[av_one_full first min_height=” vertical_alignment=” space=” custom_margin=” margin=’0px’ row_boxshadow=” row_boxshadow_color=” row_boxshadow_width=’10’ link=” linktarget=” link_hover=” padding=’0px’ highlight=” highlight_size=” border=” border_color=” radius=’0px’ column_boxshadow=” column_boxshadow_color=” column_boxshadow_width=’10’ background=’bg_color’ background_color=” background_gradient_color1=” background_gradient_color2=” background_gradient_direction=’vertical’ src=” background_position=’top left’ background_repeat=’no-repeat’ animation=” mobile_breaking=” mobile_display=” av_uid=’av-1ygi6g’]
[av_textblock size=” font_color=” color=” av-medium-font-size=” av-small-font-size=” av-mini-font-size=” av_uid=’av-jxwdsb2w’ admin_preview_bg=”]
Inlet Valve Bad Solenoid
There are two solenoids in the machine. Their main purpose is to let the water in your washer. If your solenoid has gone bad, you will hear a buzzing when the machine is filling with water. To repair the solenoid, you should seek professional help.
[/av_textblock]
[av_hr class=’default’ height=’50’ shadow=’no-shadow’ position=’center’ custom_border=’av-border-thin’ custom_width=’50px’ custom_border_color=” custom_margin_top=’30px’ custom_margin_bottom=’30px’ icon_select=’yes’ custom_icon_color=” icon=’ue808′ av-desktop-hide=” av-medium-hide=” av-small-hide=” av-mini-hide=” av_uid=’av-39s1c8′]
[av_image src=’https://careandrepairs.cawp-content/uploads/2019/08/valve-solenoid.jpg’ attachment=’4383′ attachment_size=’full’ align=’center’ styling=” hover=” link=” target=” caption=” font_size=” appearance=” overlay_opacity=’0.4′ overlay_color=’#000000′ overlay_text_color=’#ffffff’ copyright=” animation=’no-animation’ av_uid=’av-jxwds5tr’ admin_preview_bg=”][/av_image]
[av_hr class=’default’ height=’50’ shadow=’no-shadow’ position=’center’ custom_border=’av-border-thin’ custom_width=’50px’ custom_border_color=” custom_margin_top=’30px’ custom_margin_bottom=’30px’ icon_select=’yes’ custom_icon_color=” icon=’ue808′ av-desktop-hide=” av-medium-hide=” av-small-hide=” av-mini-hide=” av_uid=’av-39s1c8′]
[/av_one_full]
[av_one_full first min_height=” vertical_alignment=” space=” custom_margin=” margin=’0px’ row_boxshadow=” row_boxshadow_color=” row_boxshadow_width=’10’ link=” linktarget=” link_hover=” padding=’0px’ highlight=” highlight_size=” border=” border_color=” radius=’0px’ column_boxshadow=” column_boxshadow_color=” column_boxshadow_width=’10’ background=’bg_color’ background_color=” background_gradient_color1=” background_gradient_color2=” background_gradient_direction=’vertical’ src=” background_position=’top left’ background_repeat=’no-repeat’ animation=” mobile_breaking=” mobile_display=” av_uid=’av-1ygi6g’]
[av_textblock size=” font_color=” color=” av-medium-font-size=” av-small-font-size=” av-mini-font-size=” av_uid=’av-jxwdsb2w’ admin_preview_bg=”]
Clogged Valve
There are cases when the machine is not filling with water because of the inlet valve itself if it is clogged. The best way to deal with the problem would be to clean the valve gently if possible.
[/av_textblock]
[av_hr class=’default’ height=’50’ shadow=’no-shadow’ position=’center’ custom_border=’av-border-thin’ custom_width=’50px’ custom_border_color=” custom_margin_top=’30px’ custom_margin_bottom=’30px’ icon_select=’yes’ custom_icon_color=” icon=’ue808′ av-desktop-hide=” av-medium-hide=” av-small-hide=” av-mini-hide=” av_uid=’av-39s1c8′]
[/av_one_full]
[av_one_full first min_height=” vertical_alignment=” space=” custom_margin=” margin=’0px’ row_boxshadow=” row_boxshadow_color=” row_boxshadow_width=’10’ link=” linktarget=” link_hover=” padding=’0px’ highlight=” highlight_size=” border=” border_color=” radius=’0px’ column_boxshadow=” column_boxshadow_color=” column_boxshadow_width=’10’ background=’bg_color’ background_color=” background_gradient_color1=” background_gradient_color2=” background_gradient_direction=’vertical’ src=” background_position=’top left’ background_repeat=’no-repeat’ animation=” mobile_breaking=” mobile_display=” av_uid=’av-1ygi6g’]
[av_textblock size=” font_color=” color=” av-medium-font-size=” av-small-font-size=” av-mini-font-size=” av_uid=’av-jxwdsb2w’ admin_preview_bg=”]
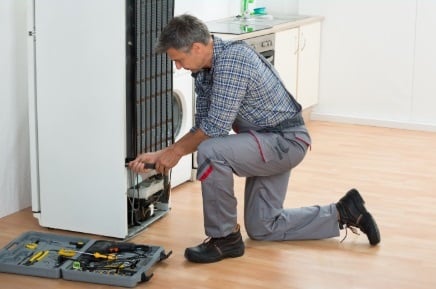
Repairing a Belt-Drive
It needs to be noted that all the belt-drive machines are different; however, in most cases, the described above methods may help you deal with the stated issue. If the problem persists after you have tried these methods, then you should use your warranty to have your washing machine fixed. Even if there is no warranty at hand, the cost of the repair shouldn’t be too high.
[/av_textblock]
[av_hr class=’default’ height=’50’ shadow=’no-shadow’ position=’center’ custom_border=’av-border-thin’ custom_width=’50px’ custom_border_color=” custom_margin_top=’30px’ custom_margin_bottom=’30px’ icon_select=’yes’ custom_icon_color=” icon=’ue808′ av-desktop-hide=” av-medium-hide=” av-small-hide=” av-mini-hide=” av_uid=’av-39s1c8′]
[av_image src=’https://careandrepairs.cawp-content/uploads/2019/08/belt-drive-684×430.jpg’ attachment=’4384′ attachment_size=’featured’ align=’center’ styling=” hover=” link=” target=” caption=” font_size=” appearance=” overlay_opacity=’0.4′ overlay_color=’#000000′ overlay_text_color=’#ffffff’ copyright=” animation=’no-animation’ av_uid=’av-jxwds5tr’ admin_preview_bg=”][/av_image]
[/av_one_full][av_one_full first min_height=” vertical_alignment=” space=” custom_margin=” margin=’0px’ padding=’0px’ border=” border_color=” radius=’0px’ background_color=” src=” background_position=’top left’ background_repeat=’no-repeat’ animation=” mobile_display=” av_uid=’av-4iqoy0′]
[av_codeblock wrapper_element=” wrapper_element_attributes=” codeblock_type=” av_uid=’av-k00l5xin’]
-
1
 Call Us
 -
2Get a Quote On-Site
-
3Get Your Appliance Fixed
-
4Visa | Cash | MasterCard
-
5Enjoy Your Day


[/av_codeblock]
[av_hr class=’default’ height=’50’ shadow=’no-shadow’ position=’center’ custom_border=’av-border-thin’ custom_width=’50px’ custom_border_color=” custom_margin_top=’30px’ custom_margin_bottom=’30px’ icon_select=’yes’ custom_icon_color=” icon=’ue808′ av-desktop-hide=” av-medium-hide=” av-small-hide=” av-mini-hide=” av_uid=’av-39s1c8′]
[av_codeblock wrapper_element=” wrapper_element_attributes=” codeblock_type=” av_uid=’av-jy7uosih’]
[av_image src=’http://dlt.ihk.mybluehost.me/wp-content/uploads/2019/01/Extended-Warranty.jpg’ attachment=’1808′ attachment_size=’full’ align=’center’ styling=” hover=’av-hover-grow av-hide-overflow’ link=” target=” caption=” font_size=” appearance=” overlay_opacity=’0.4′ overlay_color=’#000000′ overlay_text_color=’#ffffff’ copyright=” animation=’no-animation’ av_uid=’av-28q0nc’ admin_preview_bg=”][/av_image]
[/av_one_full]